FIRST THINGS FIRST
Ignore the caps lock . im not shouting . im emphasizing.
ACCORDING TO FORUM RULES
7. Members should respect the BANDWIDTH of other users and sites. The use of inline ([IMG][/IMG]) image tags pointing to data stored on third party systems for which the user has not received permission to link to may be removed.
So as a general rule I usually
make sure that a single animated gif
does not exceed 1mb in size. If you can make it
Smaller than 1mb so much the better.
If a single picture can show your point, then choose the picture over the animated gif.
THIS TUTORIAL ONLY WORKS IF YOU HAVE THE AVI (encoded in xvid or divx) OF THE FILMS
Where to get the software (these apps are freeware)
virtualdub is a portable app no need to install.
just extract the zip and double click VirtualDub.exe
http://virtualdub.sourceforge.net/
Optional for capturing screens or regions of screens
Faststone capture
http://www.portablefreeware.com/index.php?q=faststone+capture&m=Search
EXTRA NOTE: THE SCREENS YOU SEE IN VIRTUAL DUB DO NOT USE THE OVERLAY LAYER
THAT MEDIA PLAYERS USE
SO YOU CAN DO SCREEN CAPTURES JUST BY PRESSING PRINTSCREEN
THEN PASTING INTO MS PAINT AND CROPPING
OR YOU CAN USE THE FASTSTONE CAPTURE (LINK PROVIDED ABOVE),
IT’S ALSO PORTABLE AND CAN CAPTURE REGIONS OF SCREENS.
THERE IS ANOTHER WAY TO DO SCREEN CAPTURES ILL POST IT LATER.
STEP 7 CONCENTRATES ON NAVIGATING AND MARKING THE FRAMES THAT ARE
TO BE CONVERTED TO GIF. THEY ARE VERY IMPORTANT
(70 frames resized to dimensions 25% of the original creates about 1mb)
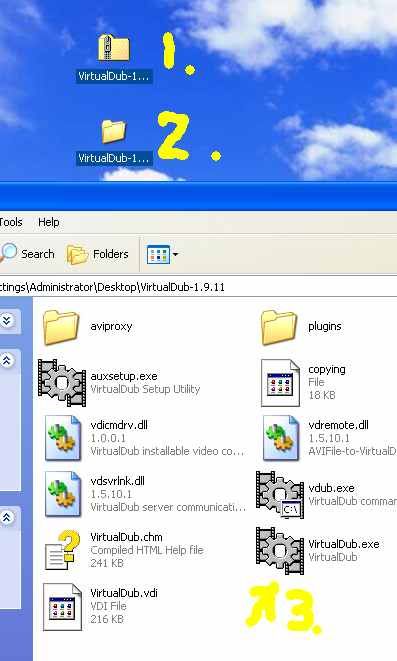
1. Download virtualdub to your desktop or any directory
2. then rightclick and extract all
3. open the new extracted directory and doubleclick on virtualdub.exe
don’t worry this application is PORTABLE, it does not need to be installed and
can run off a usb, it does not even write entries to the registry.
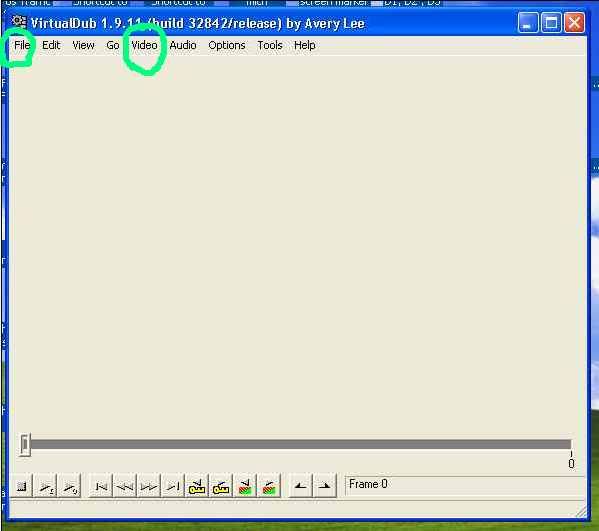
4. for the purposes of making gif we will only be concerned with file menu and video menu
.
-.
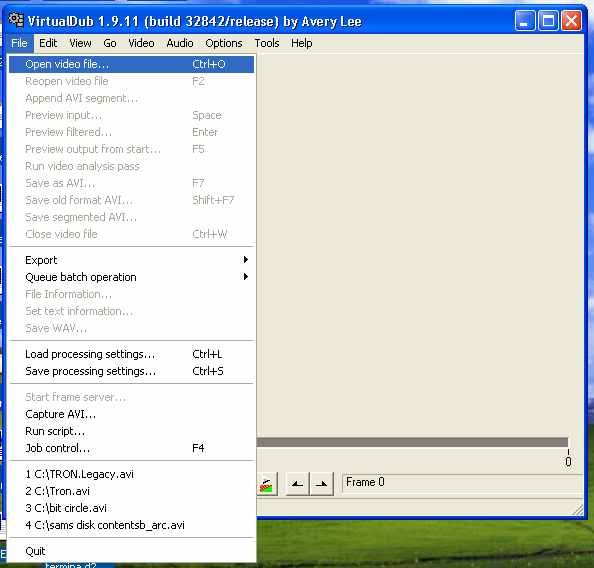
5. click on file-open (then choose the avi) or just drag the movie file into the virtualdub window
.
6. you will see two screens of your movie the top one is our main concern all the filters will be applied
at the top screen (brightness filter, resize filter more on that later)
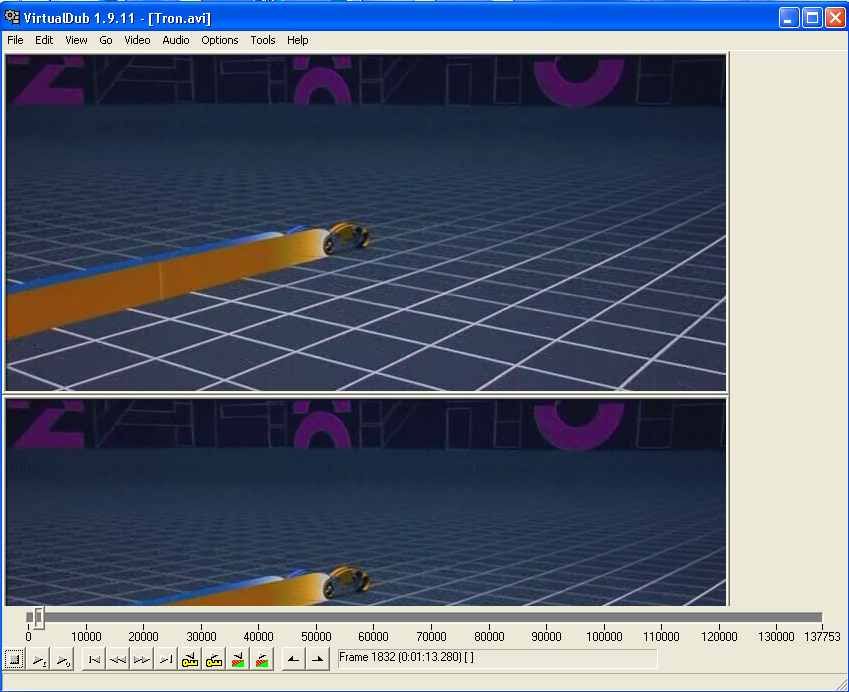
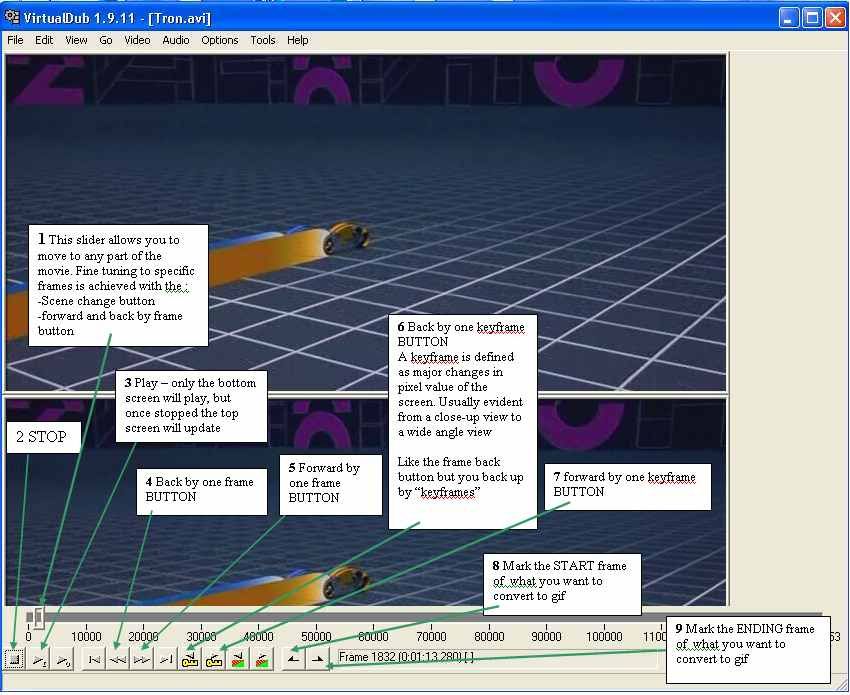
7. now we concentrate on navigating to the part of the movie we want to capture
use the navigation buttons to move to the starting frame of the scene you want to capture
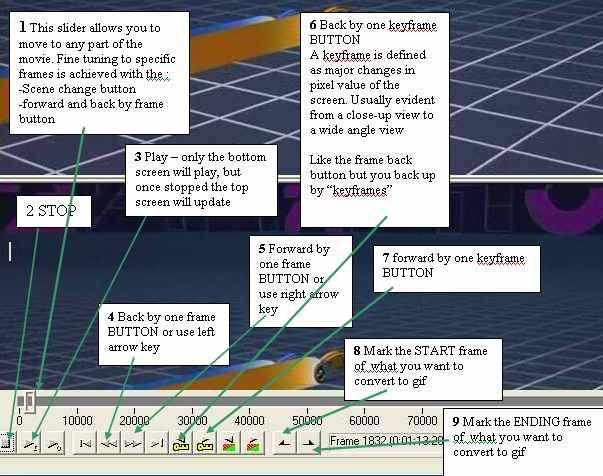
the slider in box 1 allows large movements over the timeline (this will update the display in top window)
the forward and back by keyframe buttons (box 6 and 7) allows movement in smaller time increments
the forward and back by FRAME buttons (box 4 and 5) allows movement by frames
NOTE: you can also use the
left and right arrow keys (on keyboard) to move forward and back faster by FRAMES
The object is to first find the STARTING frame where conversion will start.
Once you find that frame then mark it with the MARK START FRAME BUTTON (box 8).
Then navigate and find the ending frame where conversion will start and mark it with the MARK ENDING FRAME (box9)
.
.
.
below is what it looks like once the frames are marked (obviously ive marked a LOT of frames in this example)
.
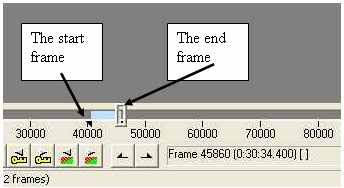
Now that the frames are marked we can begin brightness adjustments and resizing
First brightness
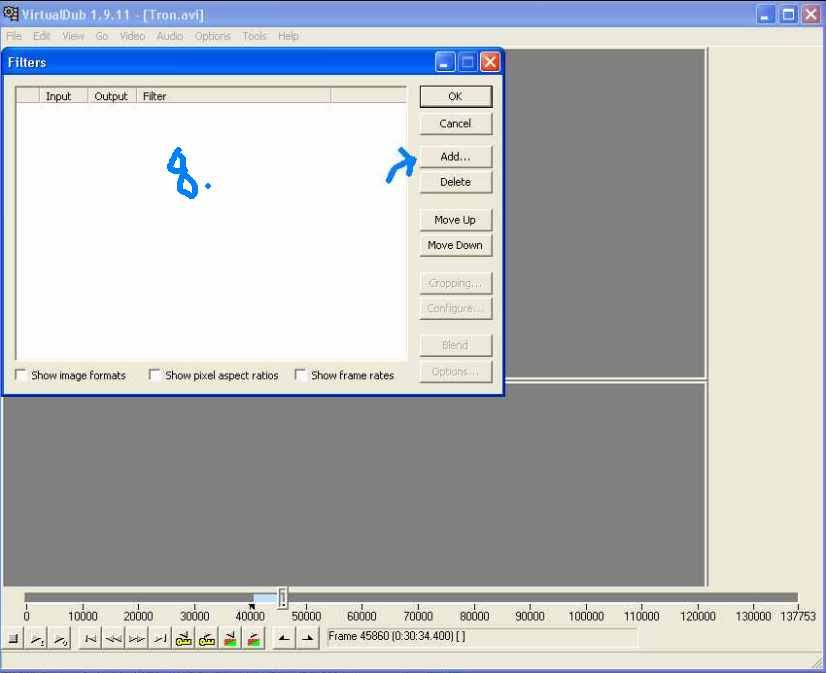
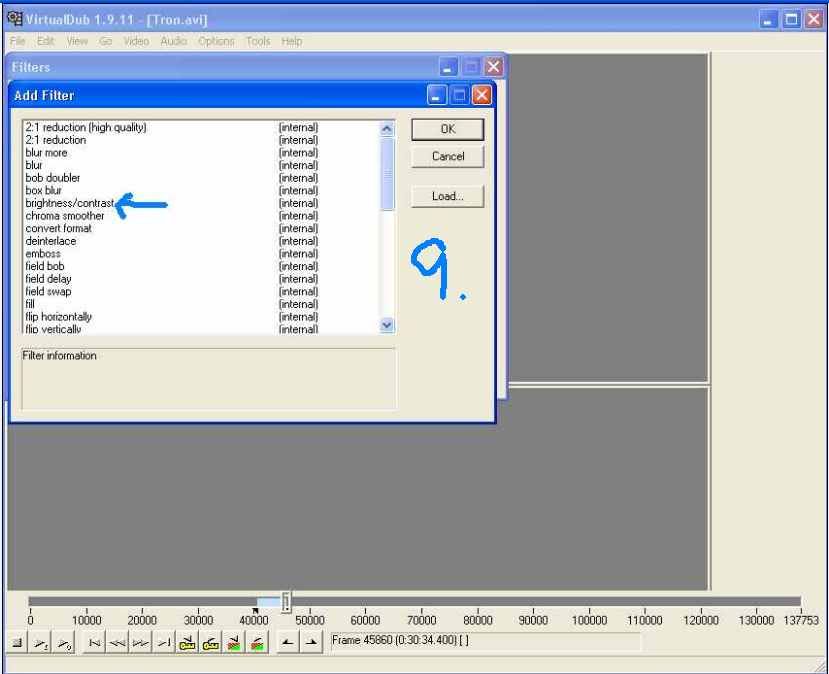
8. Choose video from menu then choose filters (or press Ctrl+F) then choose ADD.
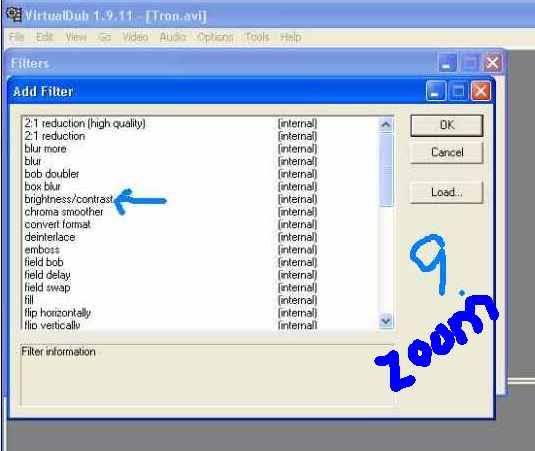
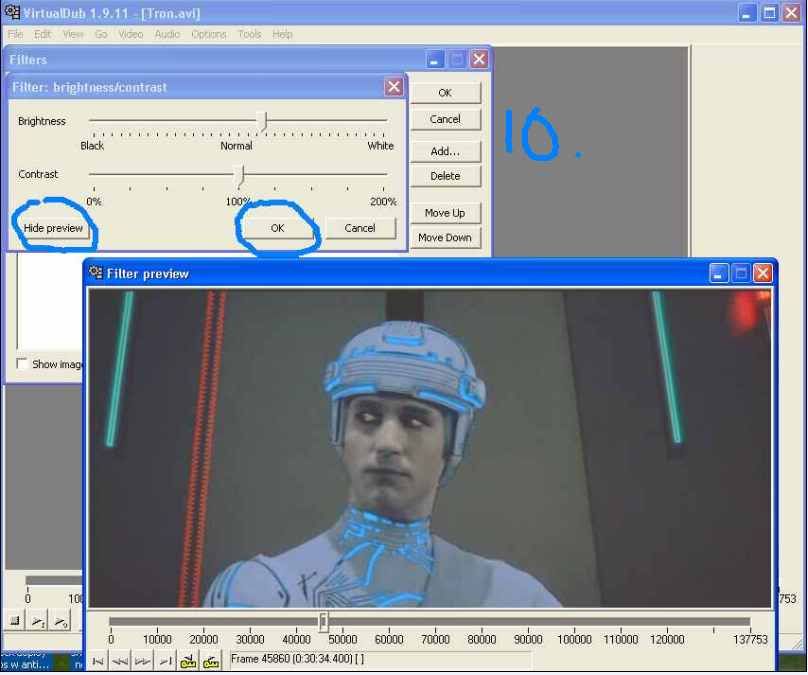
9. Then double-click brightness and contrast. Adjust to your preference. I usually just adjust brightness by 3 increments.
10.There is a show preview button when satisfied click ok
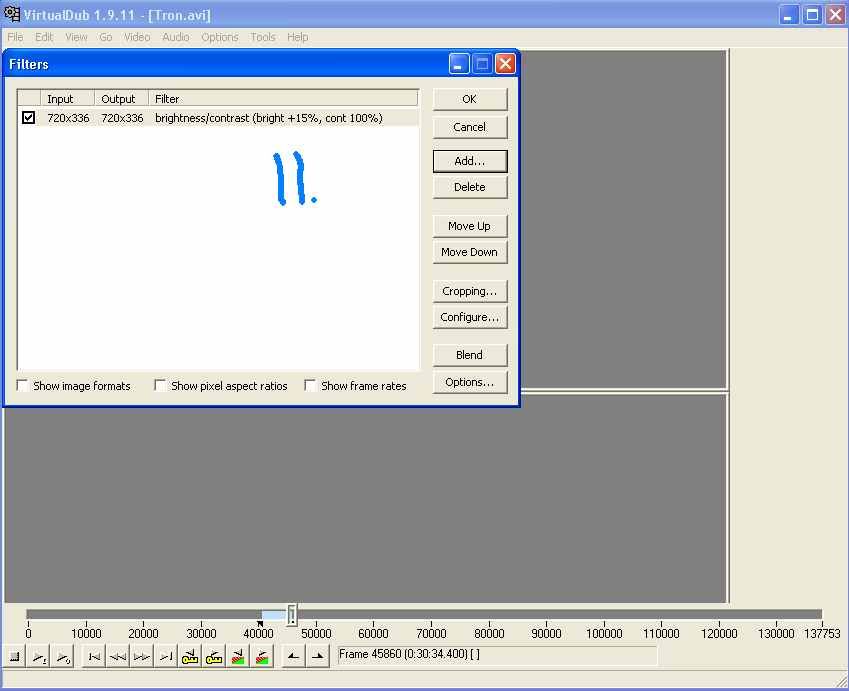
11. The filter is now added
.
.
.
.
.
.
.
.
.
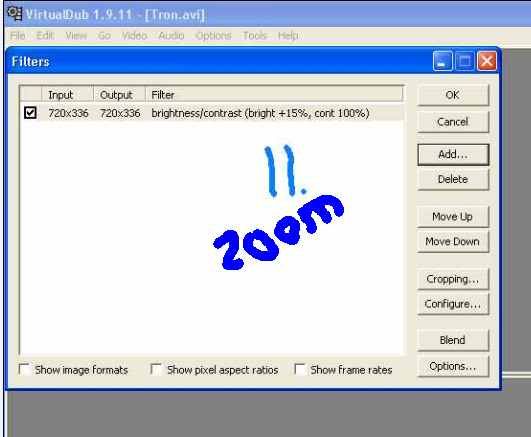
now to adjust the MOVIE DIMENSIONS. This will be ONE FACTOR in the final size of your gif
(70 frames resized to dimensions 25% of the original creates about 1mb)
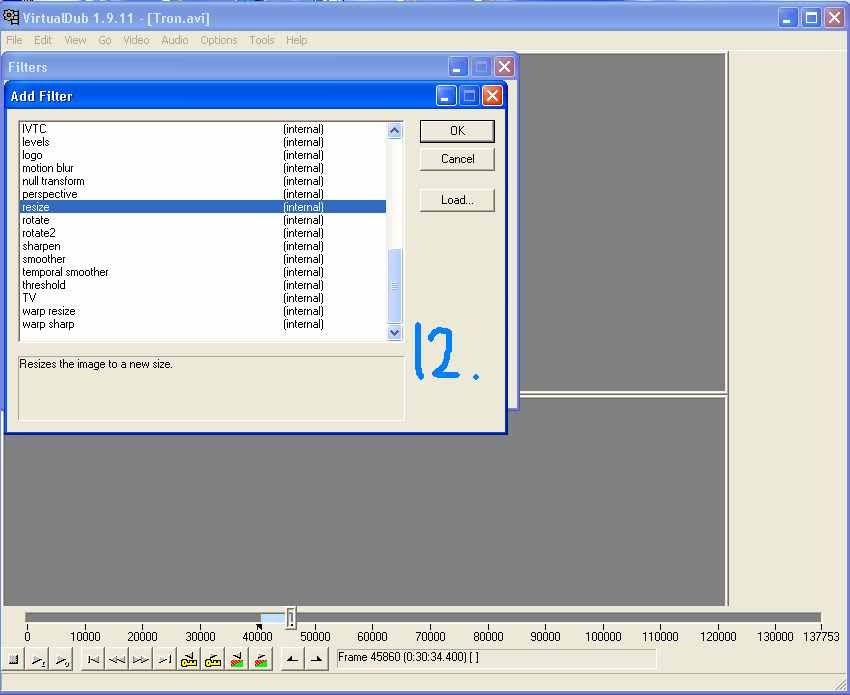
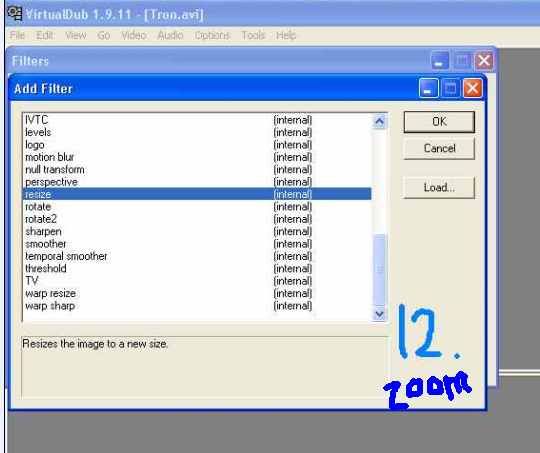
12. click add again then double-click resize
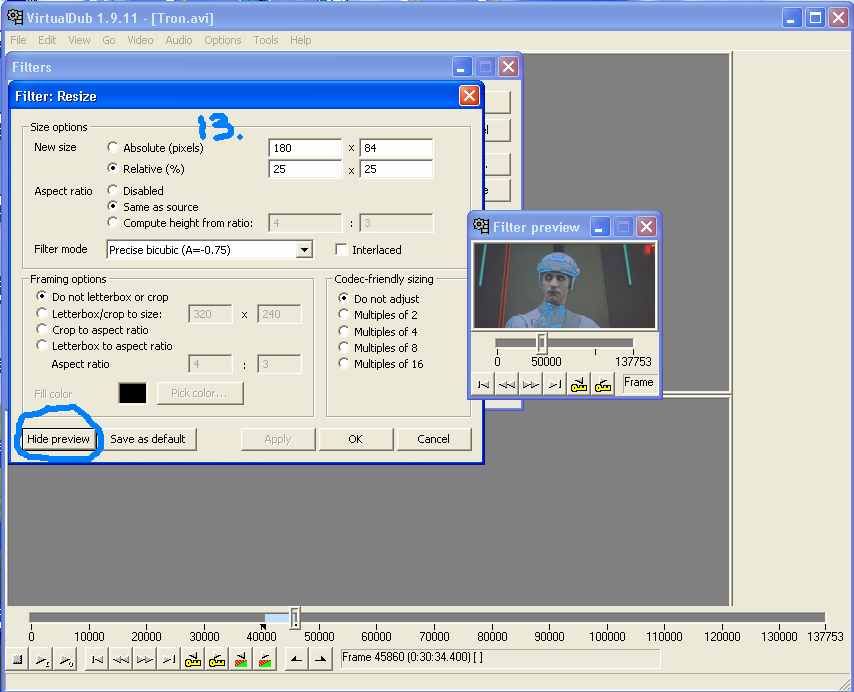
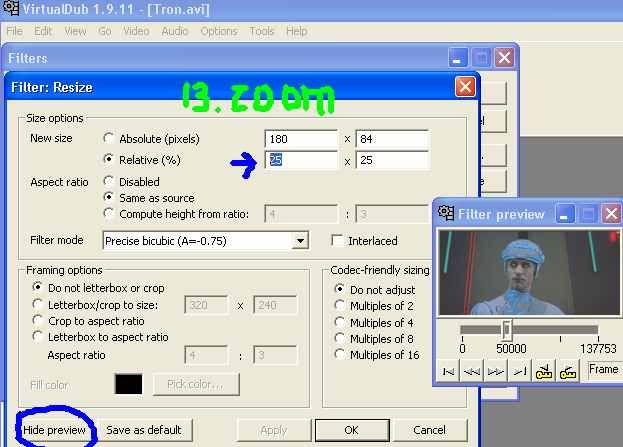
13. just change the hi-lighted 100 (in relative %) to either 25 or 30 (this resizes the top-most screen to the size for your gif)
you can also use the show preview (don’t worry about the dimensions tron-sector actually resizes the gif again )
then click ok
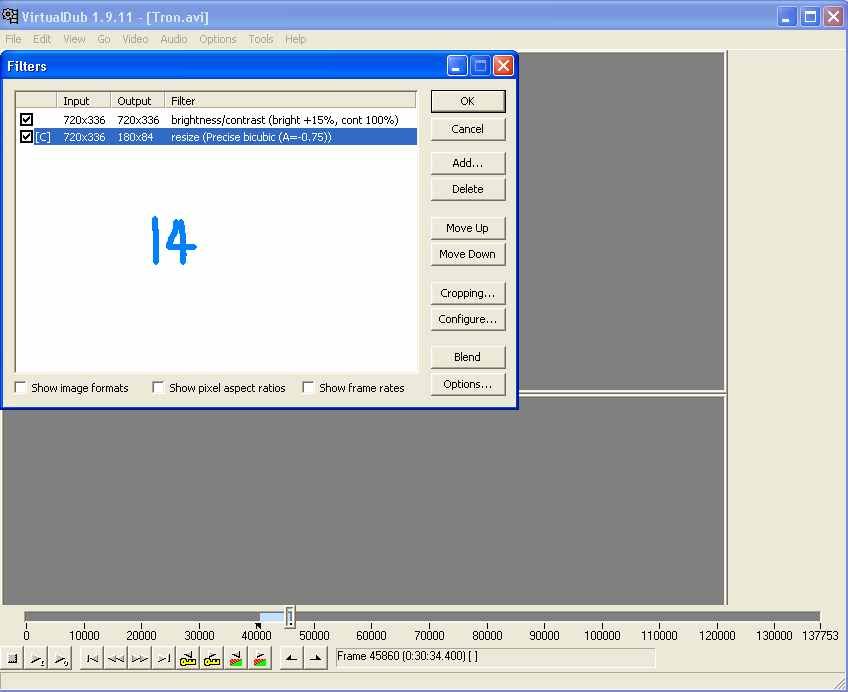
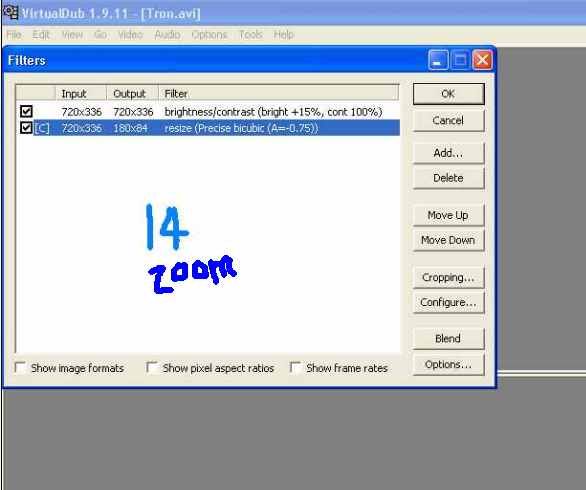
14. the resize filter is now added then click ok
NOTE you can change any of these settings later on just press ctrl+F then double click resize or brightness again
And make your changes.
.
.
.
.
.
.
.
.
.
Now you are ready to save to gif
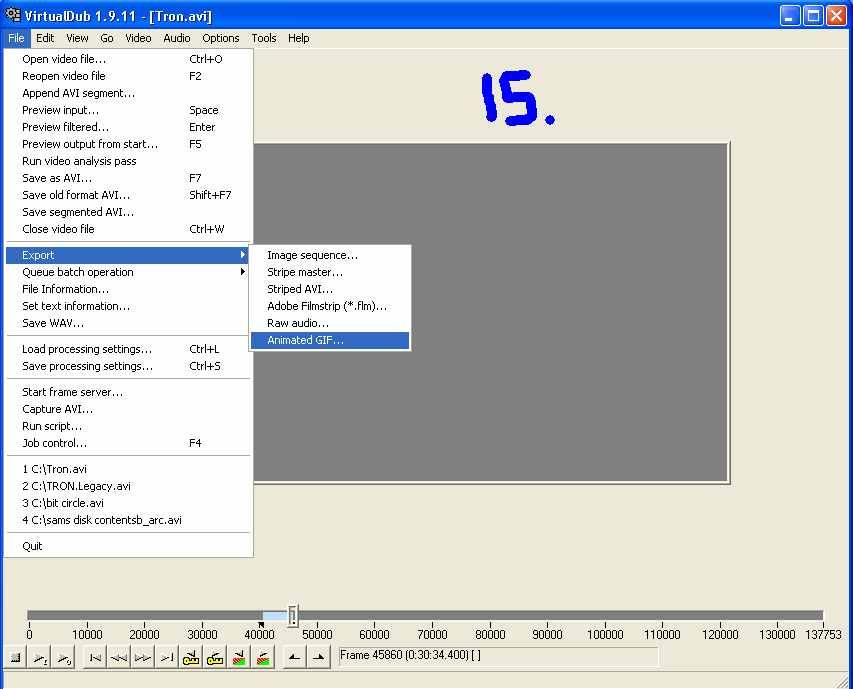
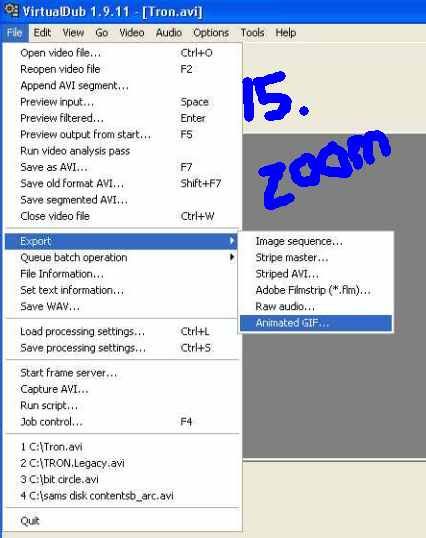
15. goto file export then animated gif (leave it on infinite loop) and save to a DIFFERENT filename. DO NOT CLOSE VIRTUAL DUB YET, JUST
MINIMIZE IT OR DRAG IT TO ONE SIDE OF YOUR SCREEN.
16. you need to check the actual size of the resulting gif. Open explorer and click on the gif to determine its size. It it exceeds 1mb
you can DECIMATE FRAMES .(THIS IS THE OTHER FACTOR THAT DECIDES FINAL GIF SIZE)
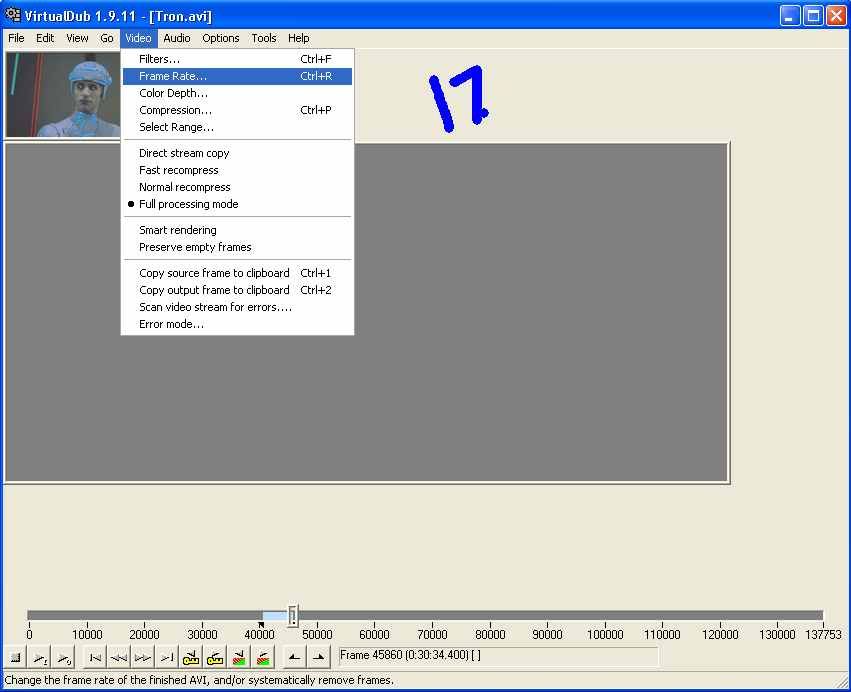
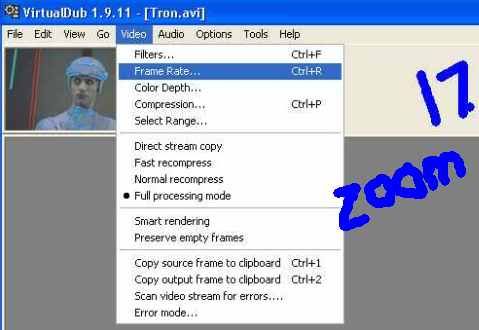
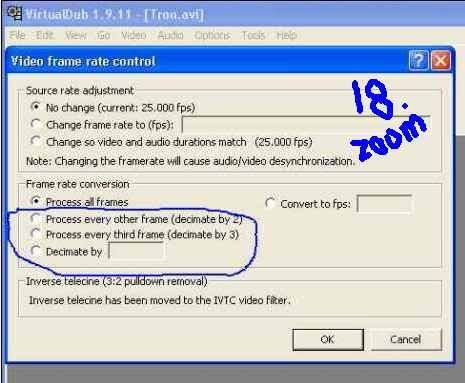
17. goto VIDEO menu and choose Frame rate or press Ctrl +R
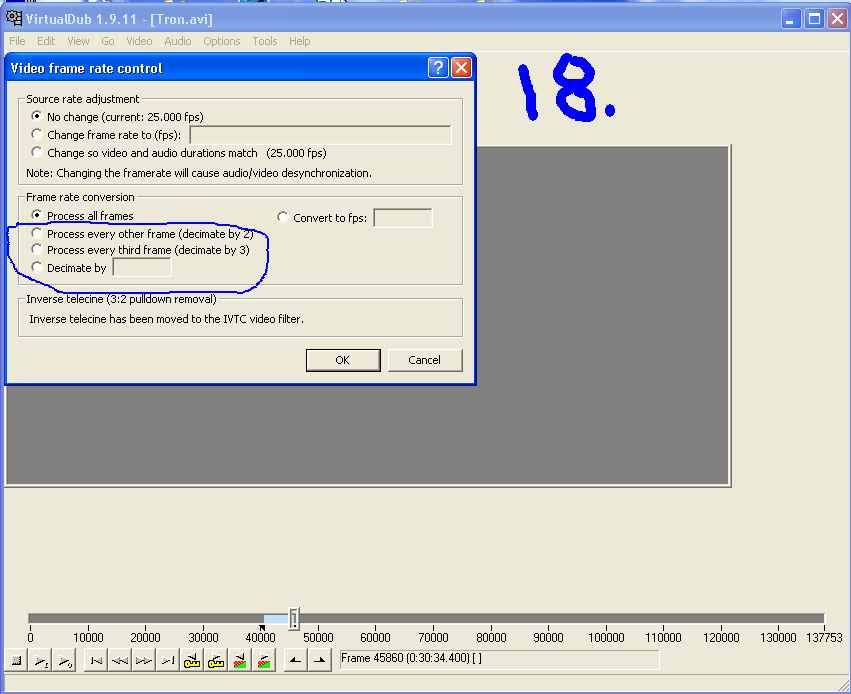
18. choose either decimate by 2 (which will CUT GIF FILESIZE BY HALF) or choose decimate by 3
decimate by 2 means only the frame # 2,4,6… will be included in the gif
decimate by 3 means only frame # 3,6,9… will be included in the gif
then click OK once you have made your choice.
19. repeat step 15 in saving the GIF (try saving to another name if you like) DON’T CLOSE VIRTUAL DUB YET.
Check the size of the new gif if it is still large try to decimate it again STEP 17 TO 18
.
.
.
.
.
.
.
.
.
.
EXTRA NOTE THE SCREENS YOU SEE IN VIRTUAL DUB DOES NOT USE THE OVERLAY LAYER
THAT MEDIA PLAYERS USE
SO YOU CAN DO SCREEN CAPTURES JUST BY PRESSING PRINTSCREEN
THEN PASTING INTO MS PAINT AND CROPPING
OR YOU CAN USE THE FASTSTONE CAPTURE (LINK PROVIDED ABOVE), IT’S ALSO PORTABLE AND CAN CAPTURE
REGIONS OF SCREENS.
REMINDER: BE MINDFUL of the final sizes of your animated gifs. Some members might not
have fast internet connections.
to sum up the procedure
1. mark the frames you want to convert
2. adjust size of movie dimensions
3. optional adjust brightness.
4. export to gif
5. if gif is large decimate by 2 or by 3
6. repeat step 4 and 5 until gif is less than 1mb
7. close virtualdub
abortion pills online abortion questions cytotec abortion